Filter By Tags

Written by Annie
Last updated
Filter by Tags allows customers to search for products by selecting specific tags. Make sure your product has tags such as Color, Material, etc.
1. Enable Filter by Tags option
To enable this option, please click on Main Collection > scroll to the COLLECTION FILTER > select filter type: "Filter by Tags"
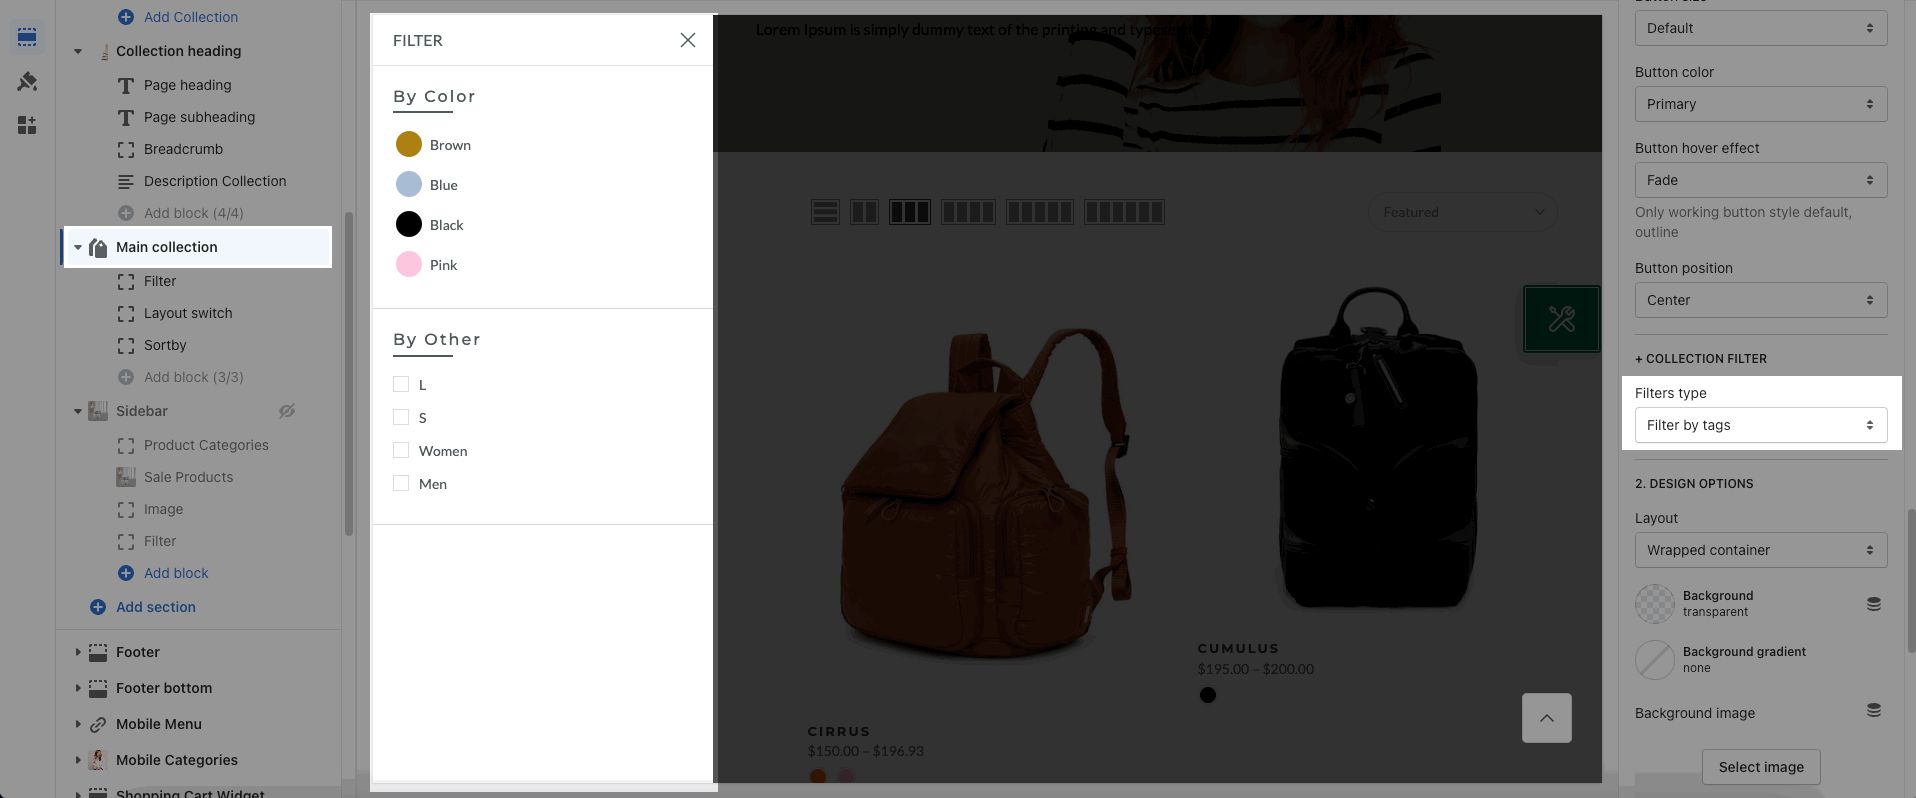
Filter Type: "Filter by tags"
2. Add tags for product
This is an important step, you need to add tags for the products. From Shopify Dashboard > Products > All products > Select Products to add tags.
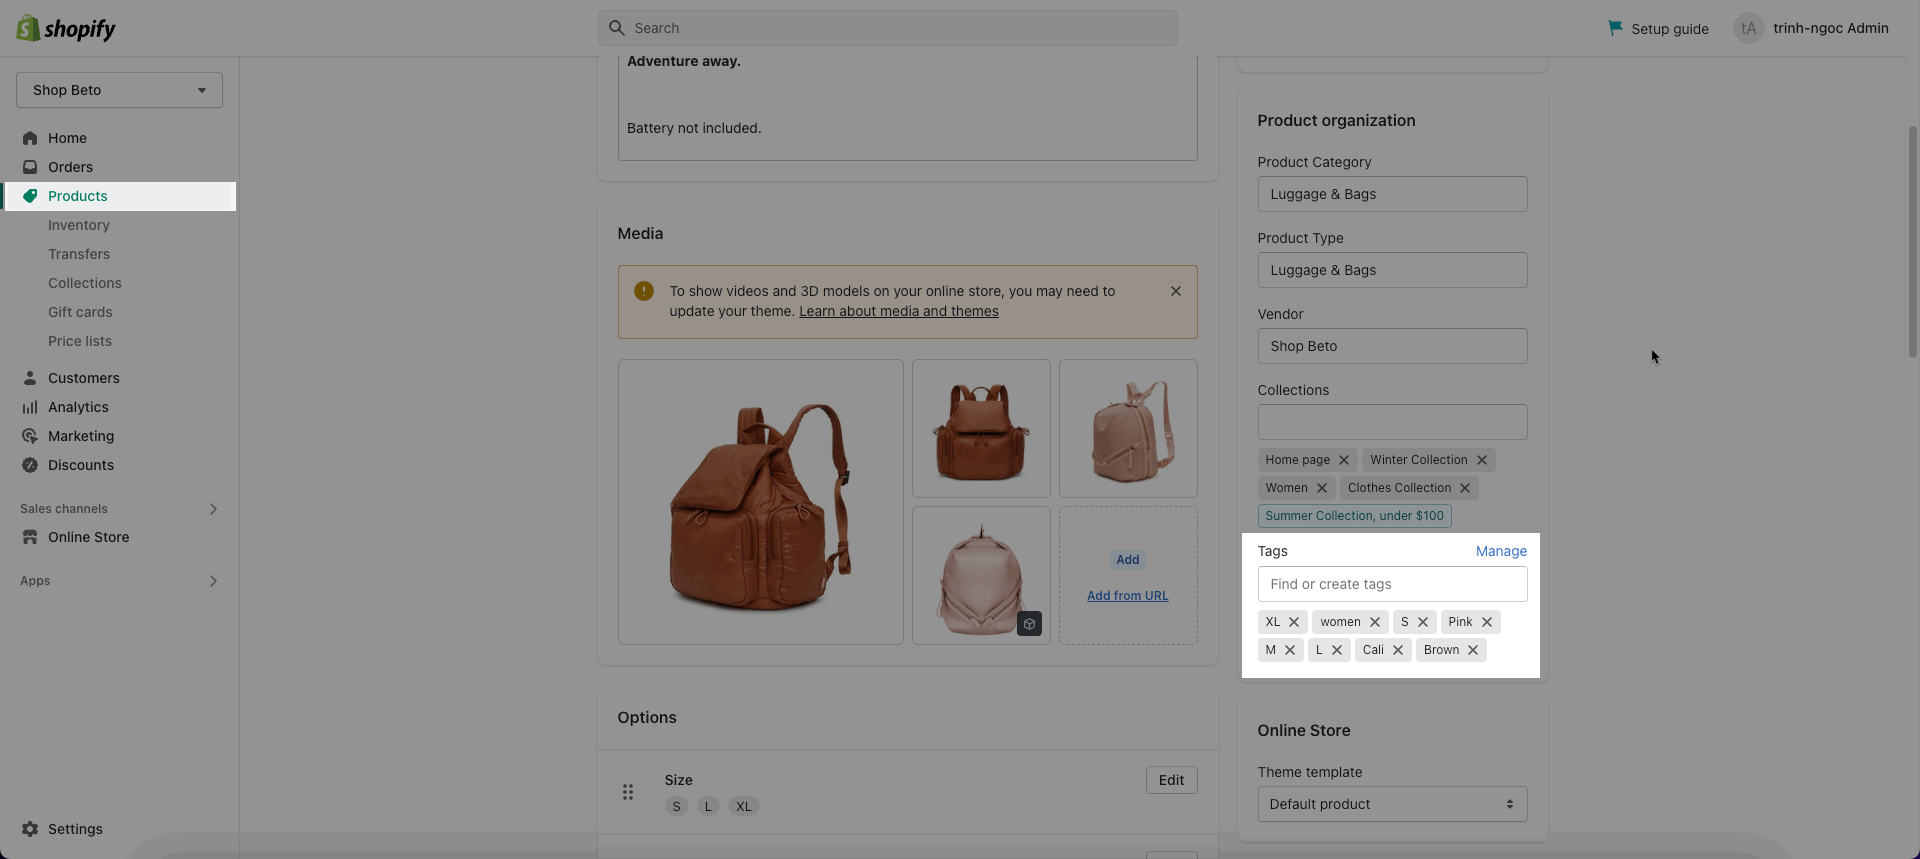
Add tags for product
3. How to Configure Filter Tags section?
After you added the tags for products, you will configure the option on the Sidebar. Each block will correspond to a group tag that you attach to the product.
Click on Filter by Tags > Add blocks to show.
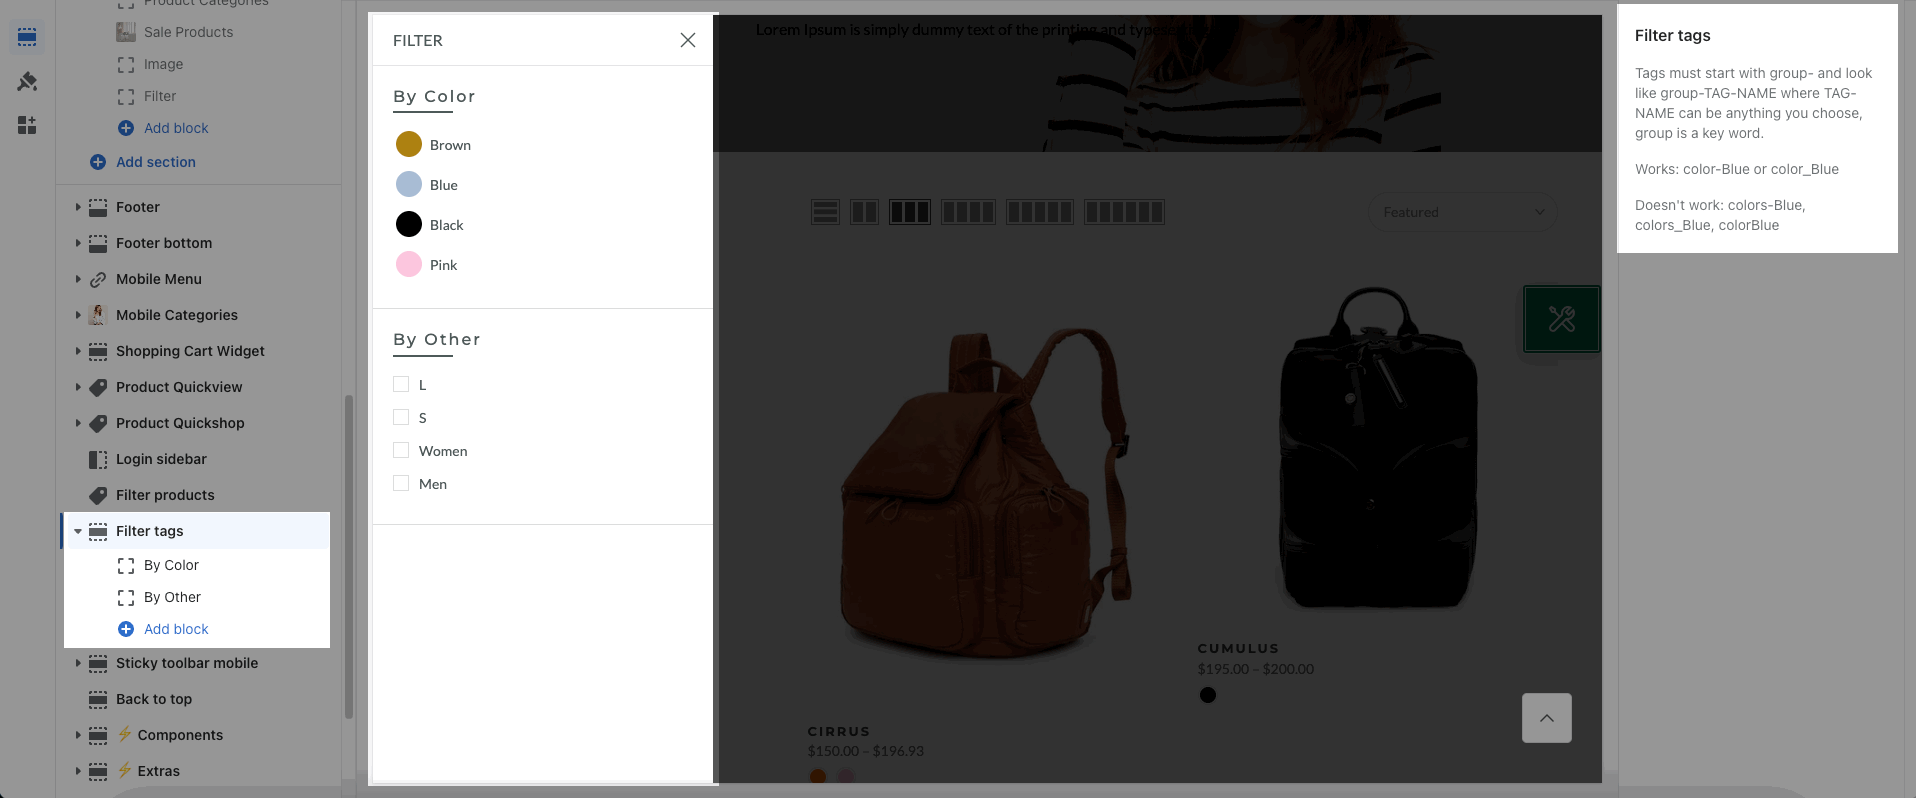
Hidden block: If checked block will be set to hidden.
Filter by categories title: Named follows the tags you’ve added, i.e By Color, By Size.
3.1. Shop by tags list
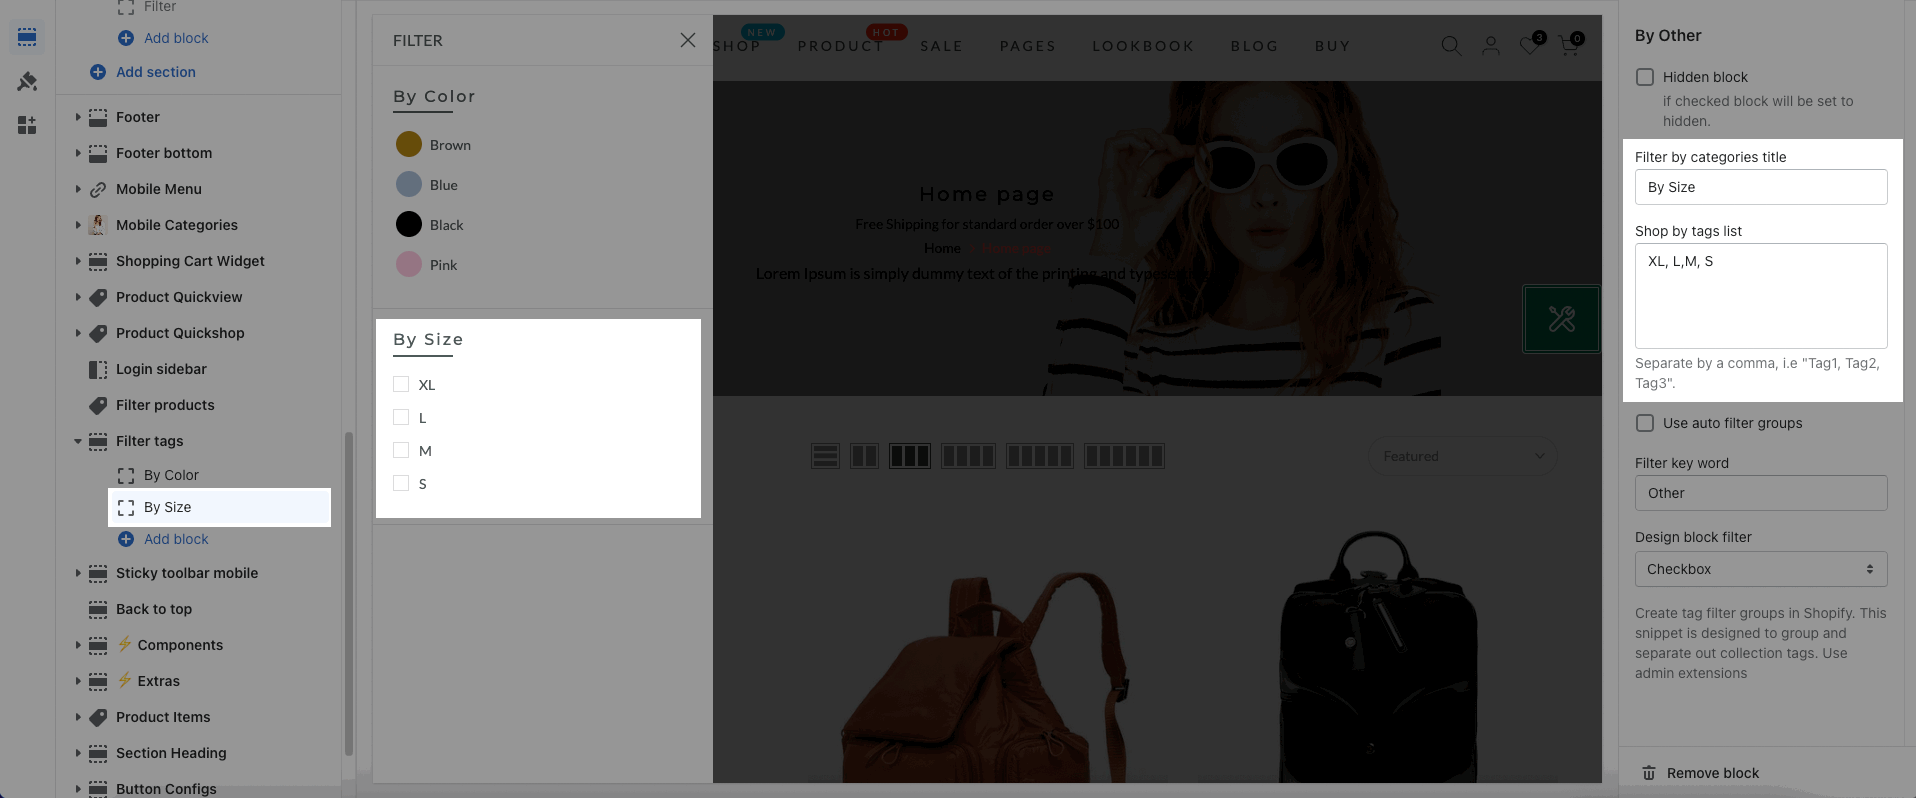
You need to enter the tags name here, i.e: Black, Pink, White, Blue, Green, Cyan.
This option allows you to fill the tag manually, so you can control the tag that you want to show. It can help to position tags as you want, i.e: sort the size of shoes or clothes.
Step 1: Add product tags
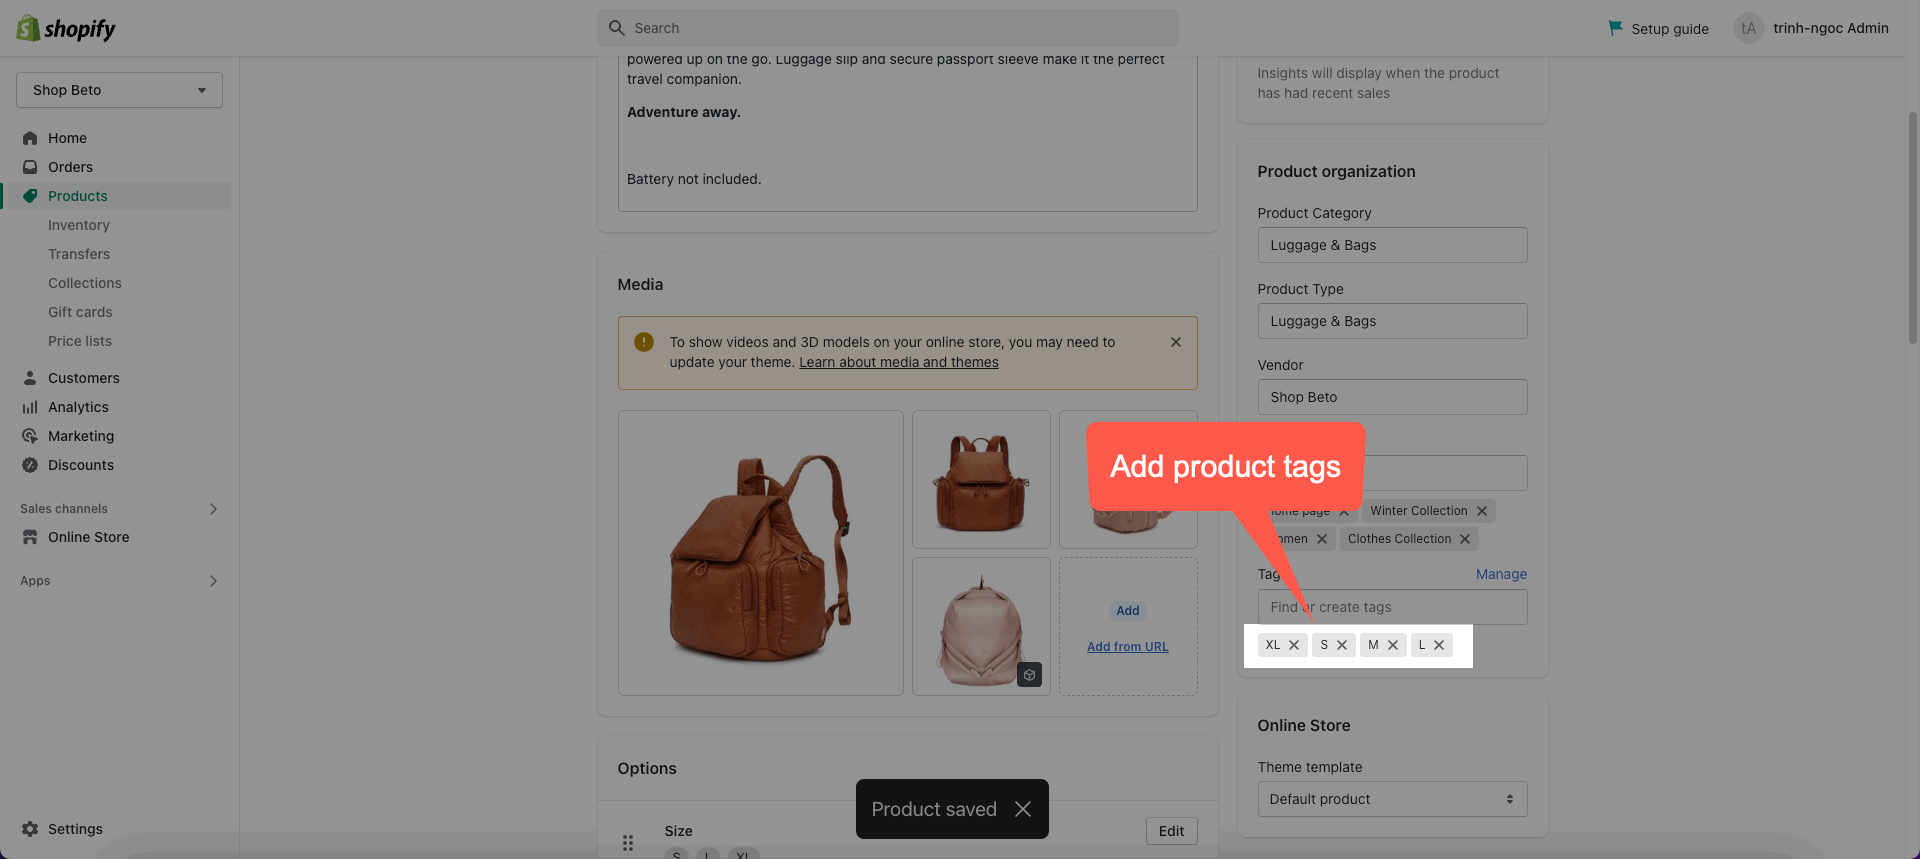
Step 2: Add the tags list to the Filter block
3.2. Use auto filter groups
This option will show all the filters in same the group. The data will be retrieved in the tags you entered in Product Tags, so the position of the tags will also be sorted automatically.
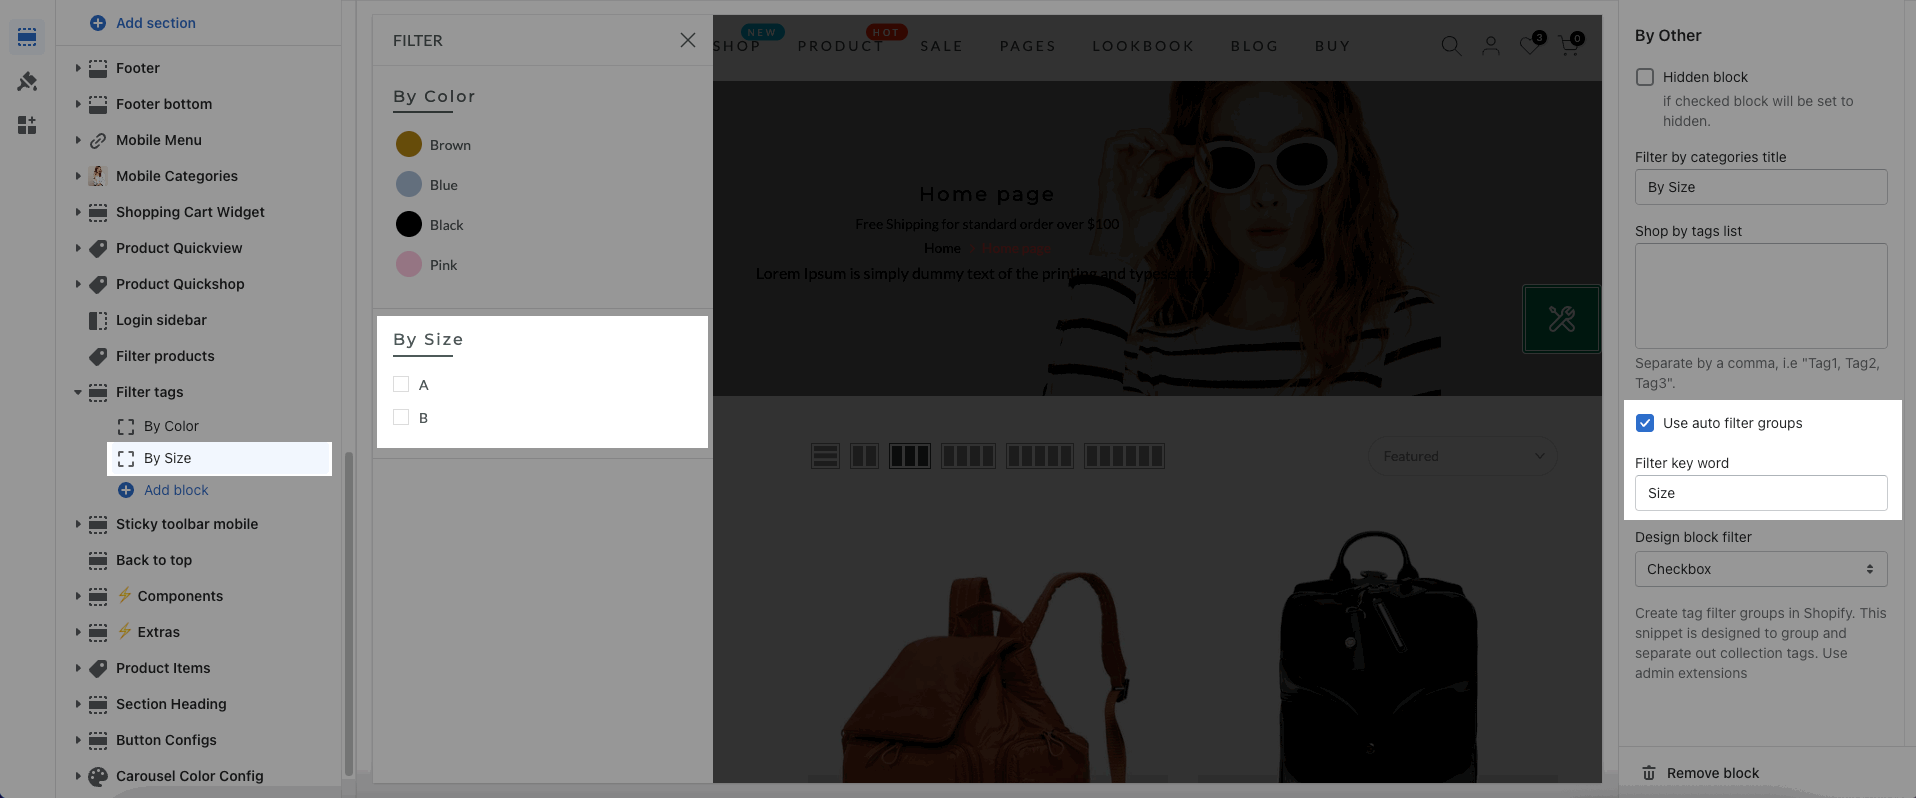
Filter keyword: Please enter the key for filter group, i.e: Color, Size, Brand.
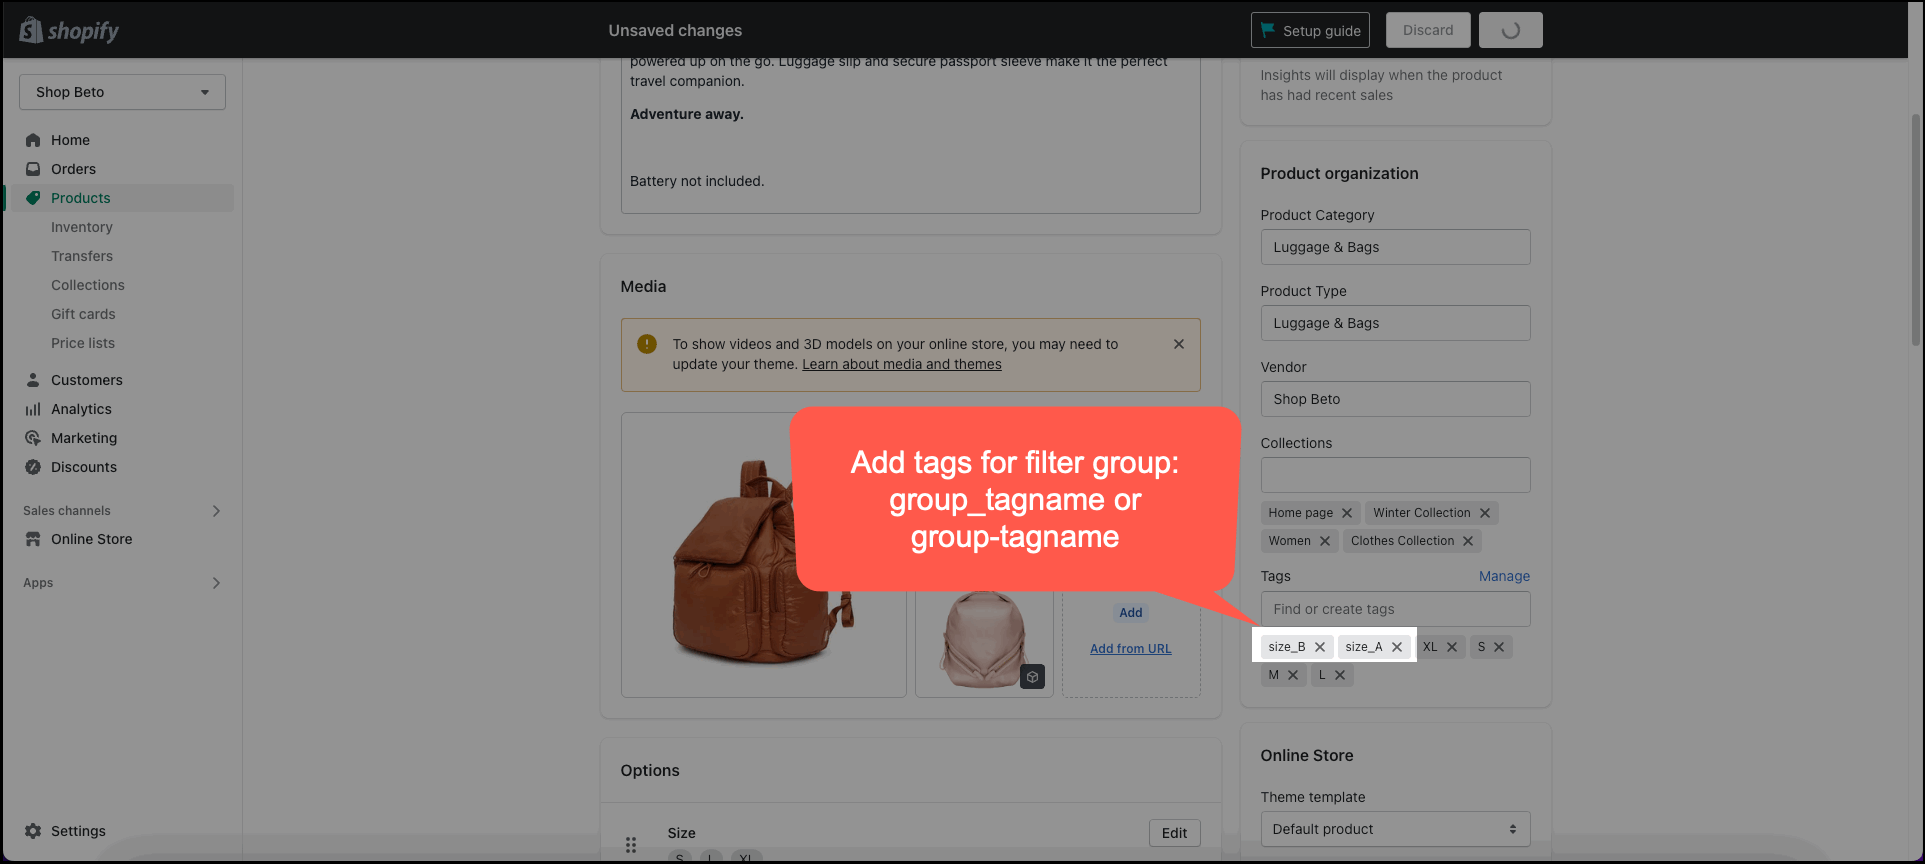
Step 1: You need to add the tags: group_tagname or group-tagname. If you don't create the tags like that, it will not work.
For example, work: size_L, size-S, doesn't work: size L, sizeS.
Step 2: Enable Use auto filter groups and fill in the keyword.
Design block filter: There are 3 designs: Default, Checkbox and Tag, try each and select the design that you want.
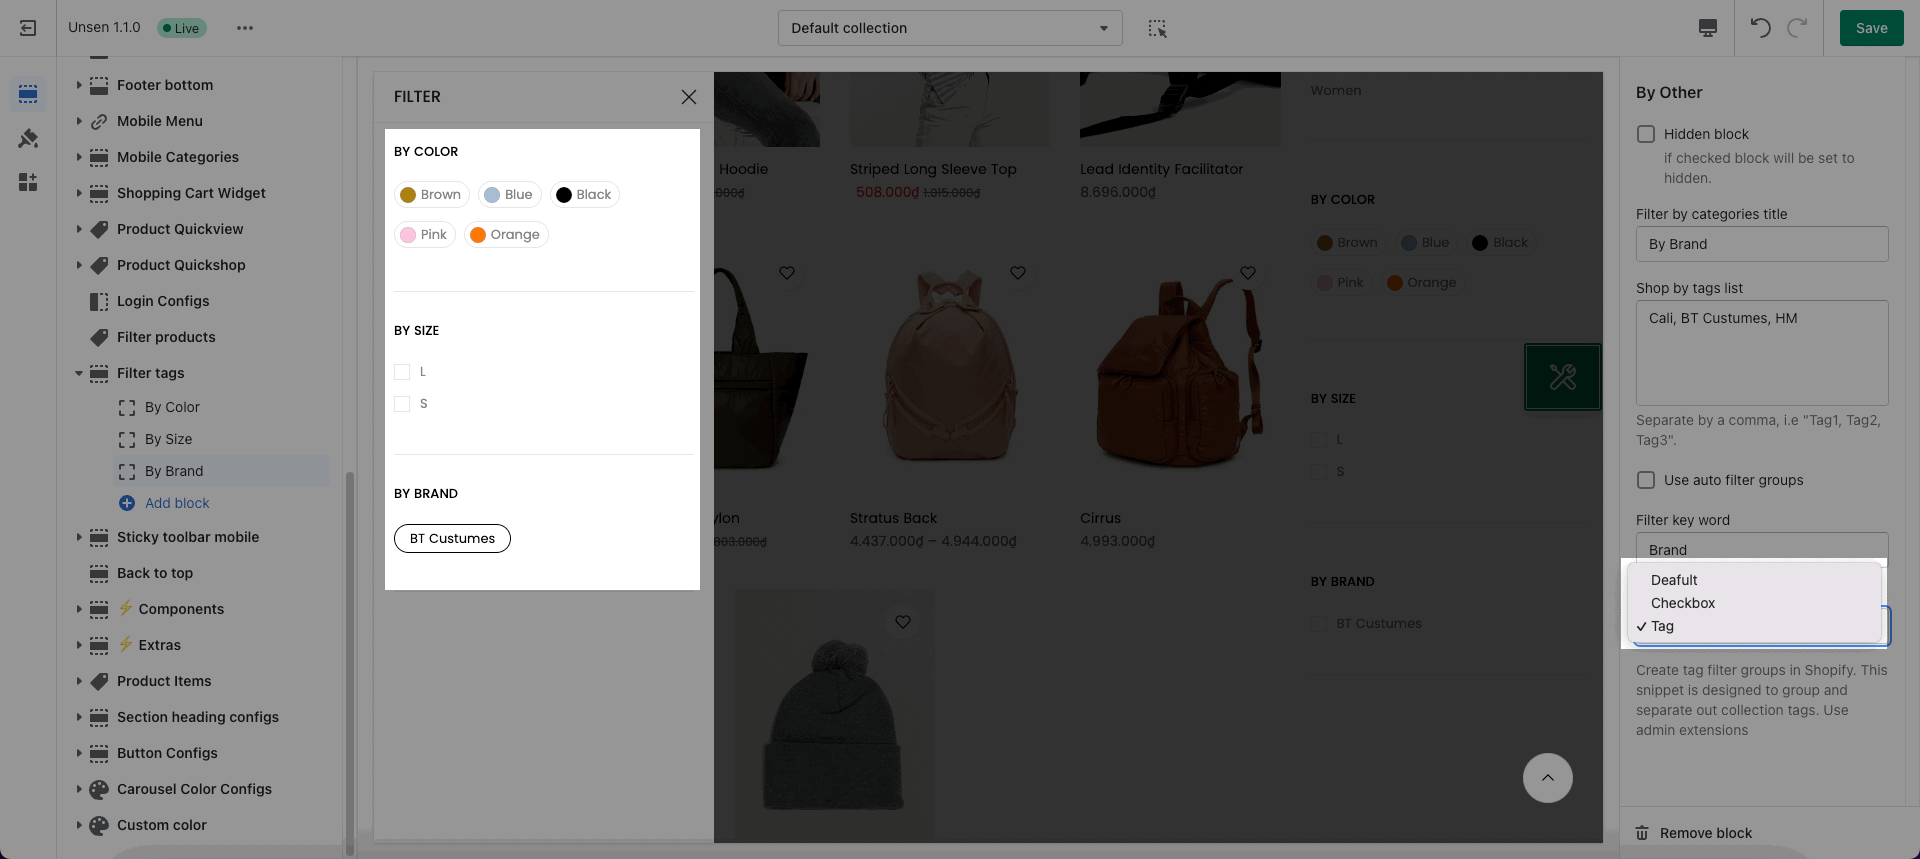
Design block Filter
